
Create your Stripe restricted key
To take card payments, you connect your Stripe account to Stemfra using a restricted key. Think of it as a limited password that only lets Stemfra do the few things it needs (start a checkout, confirm a payment, and issue a refund) and nothing else. This takes about 10 minutes. You will need a Stripe account, which is free to create at stripe.com.
Test mode versus live mode: the screenshots below are from Stripe's test mode, for trying things out with test cards. When you are ready to take real payments, turn off test mode in Stripe first, then follow the exact same steps. Your key will start with rk_live_ instead of rk_test_.
Step 1: Open your API keys in Stripe
Log in to Stripe. In the left sidebar, click Developers (bottom-left), then API keys. Click the "+ Create restricted key" button in the top-right of the Restricted keys box.
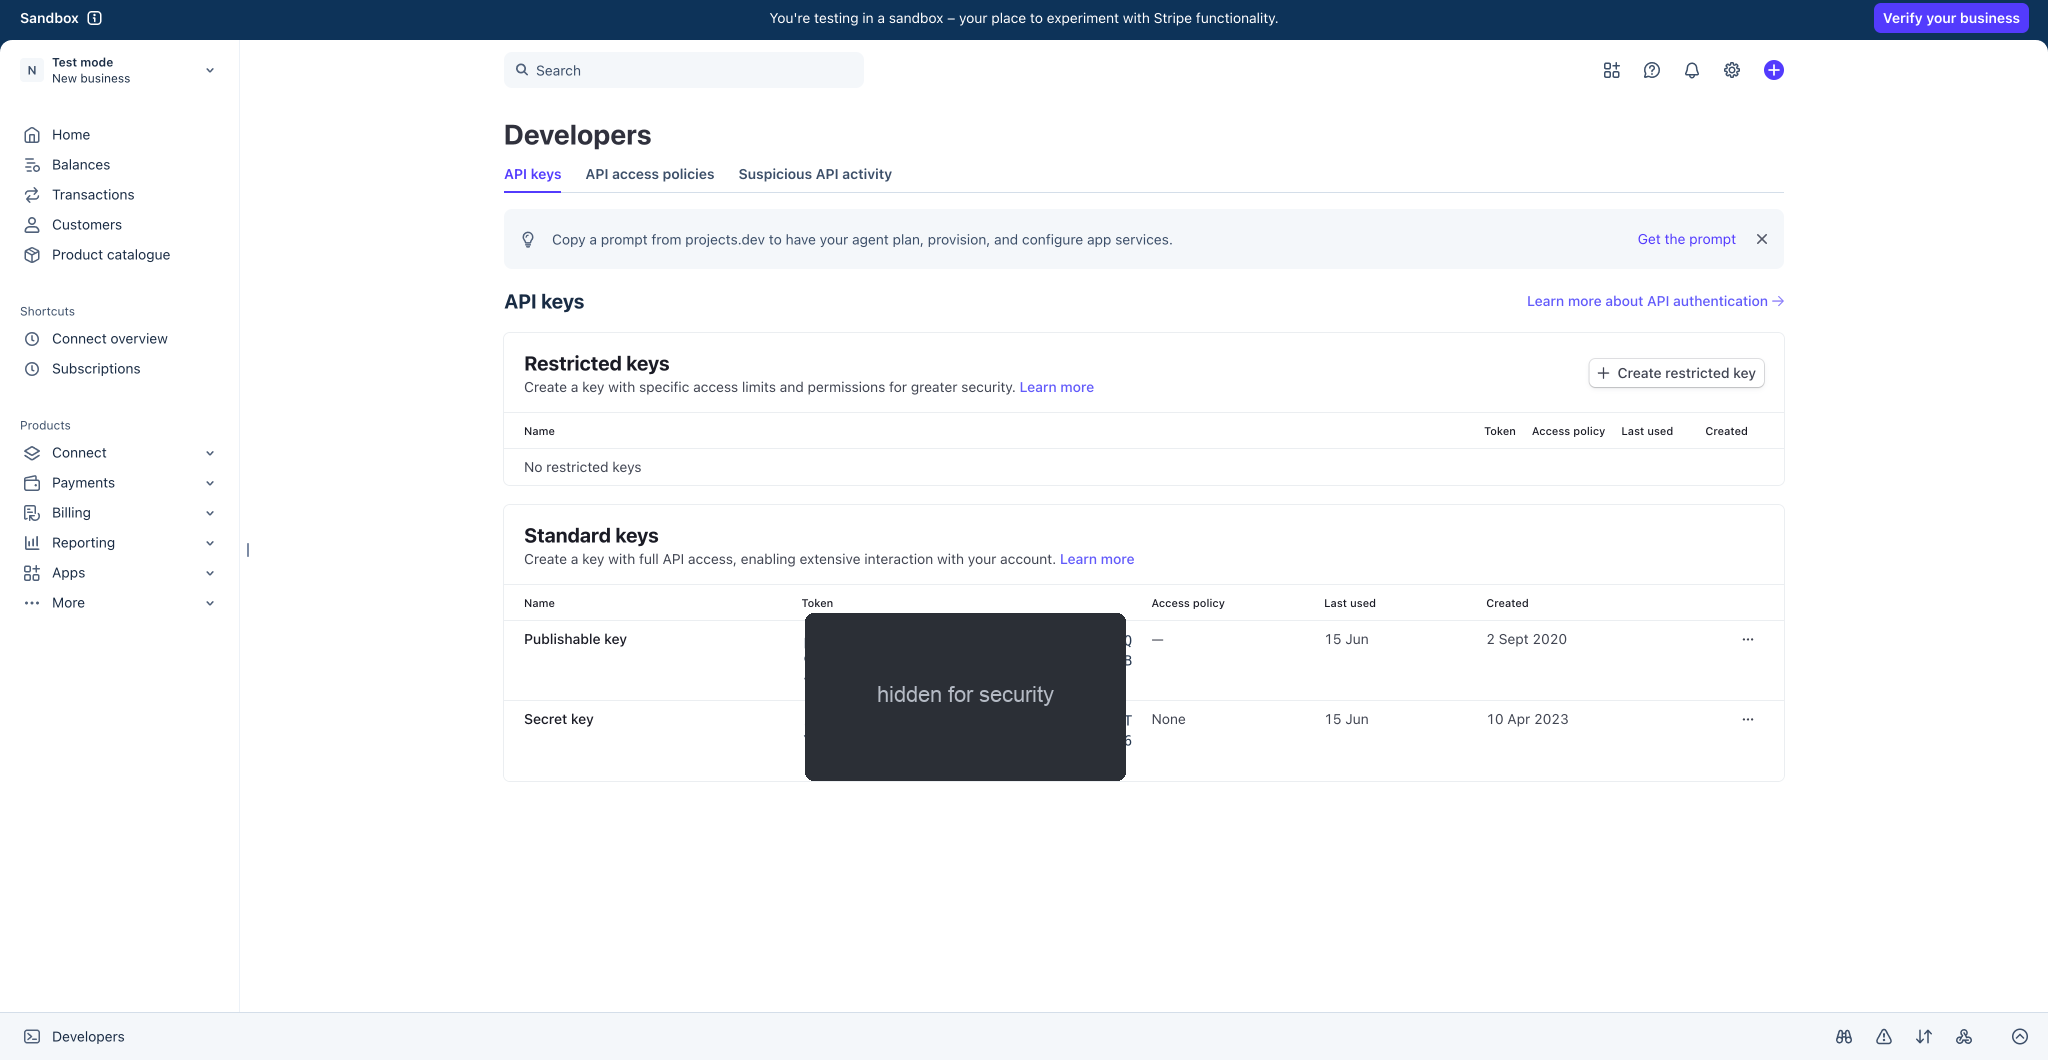
Never share your Secret key (the one starting sk_) with anyone. Stemfra does not need it. You only ever create and share a restricted key.
Step 2: Choose "third-party application"
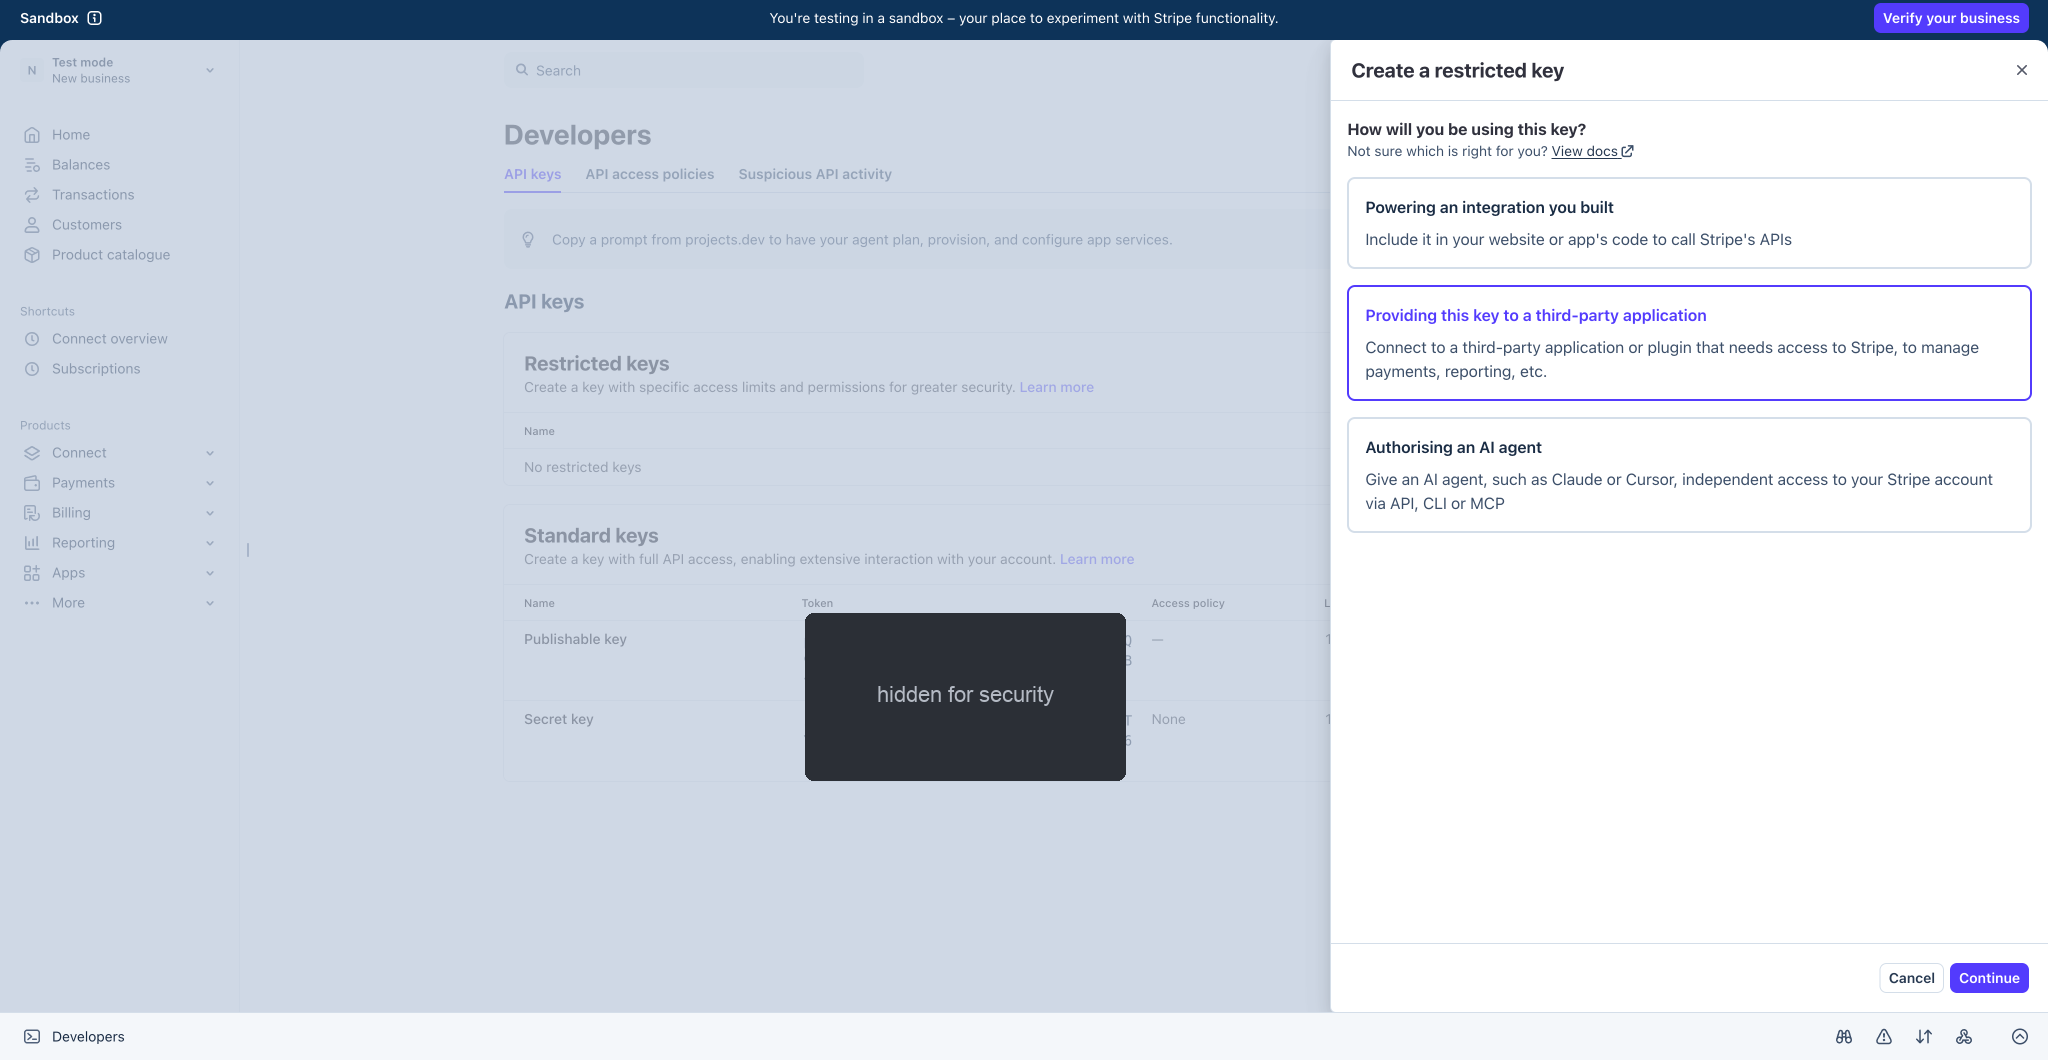
Stripe asks how you will use this key. Choose the middle option, "Providing this key to a third-party application" (Stemfra is the third-party application). Then click Continue.
Step 3: Enter the website details
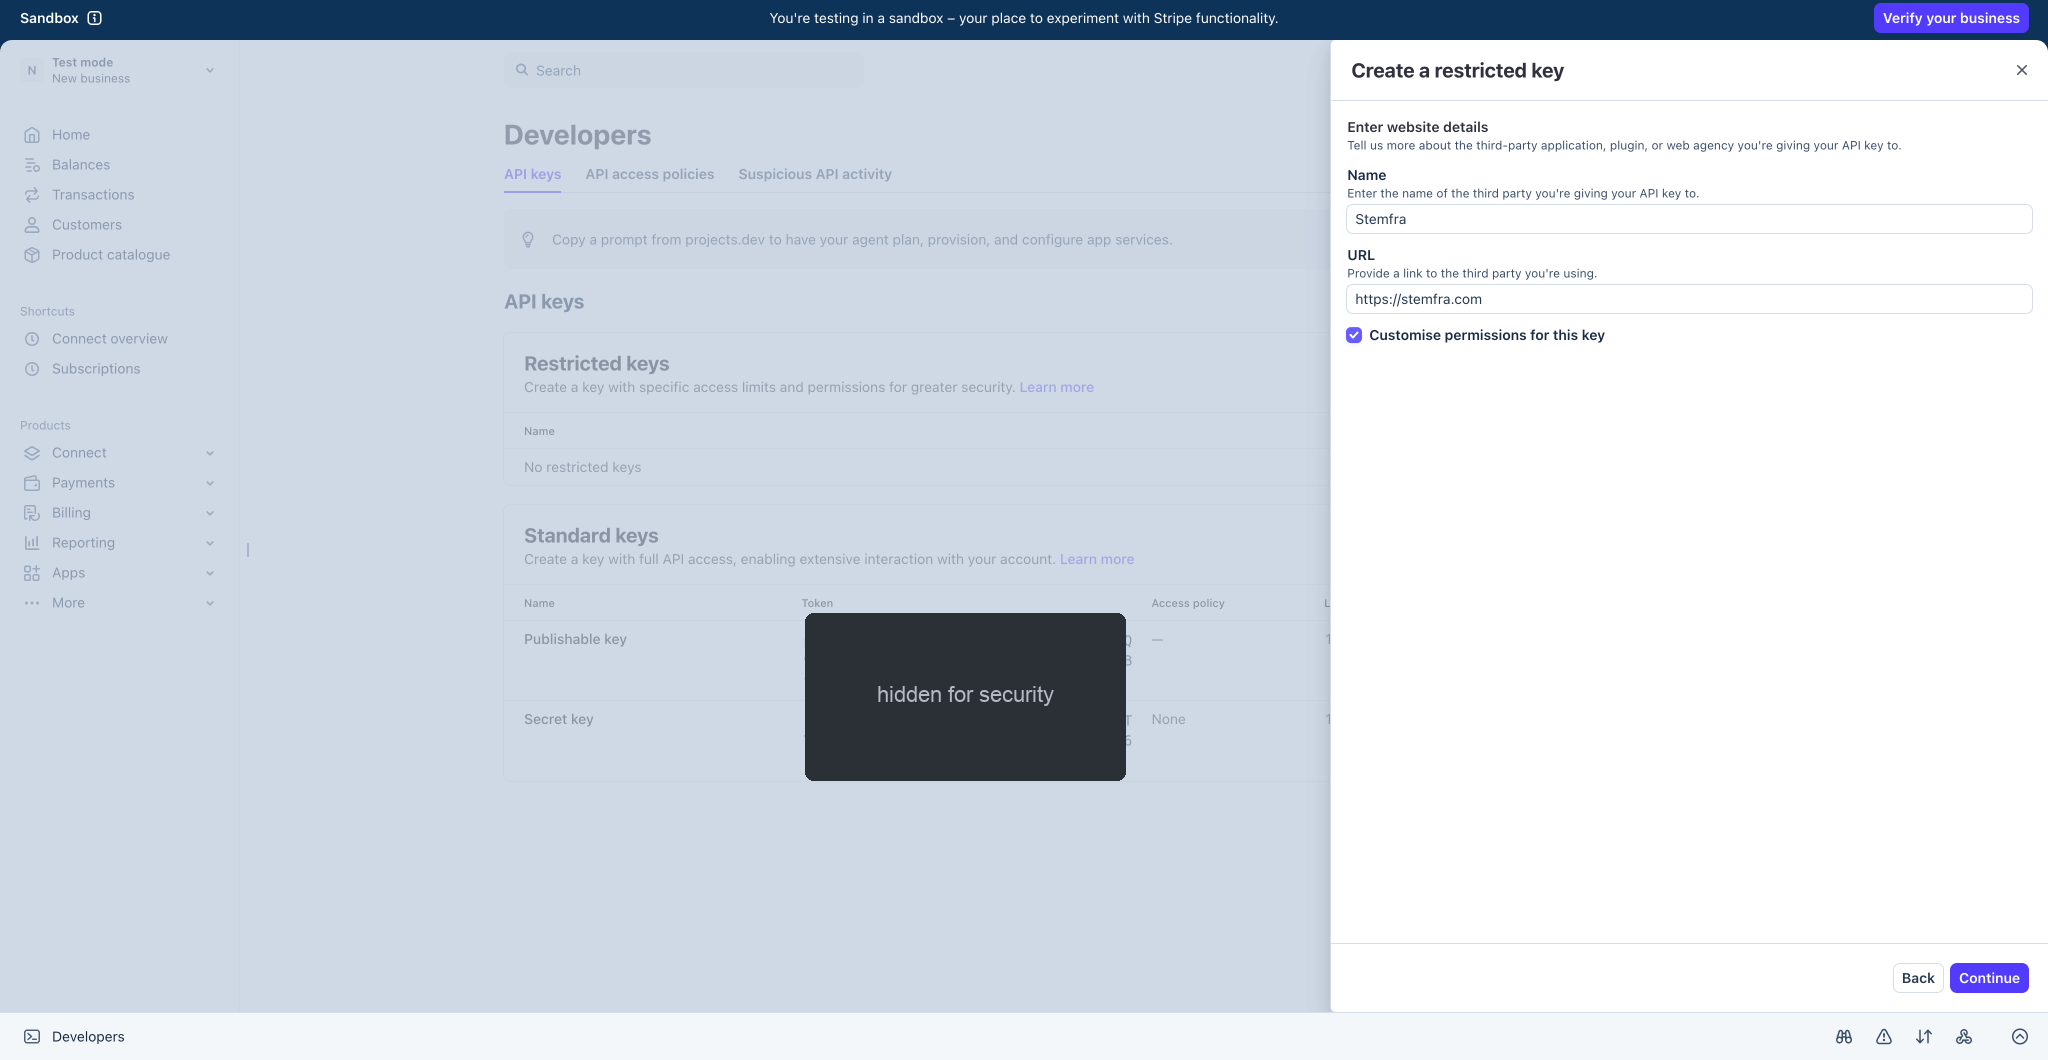
Fill in the Name as Stemfra and the URL as https://stemfra.com. Then tick the box "Customise permissions for this key", which lets you limit the key to only what Stemfra needs. Click Continue.
Step 4: Set the permissions
This is the most important screen. Stripe shows a long list of resources with two columns of buttons. The left column, Permissions, controls access to your own account, and is the only column you touch. The right column, Connect permissions, is for businesses that manage other companies' accounts, which is not you, so leave the entire right column set to None.
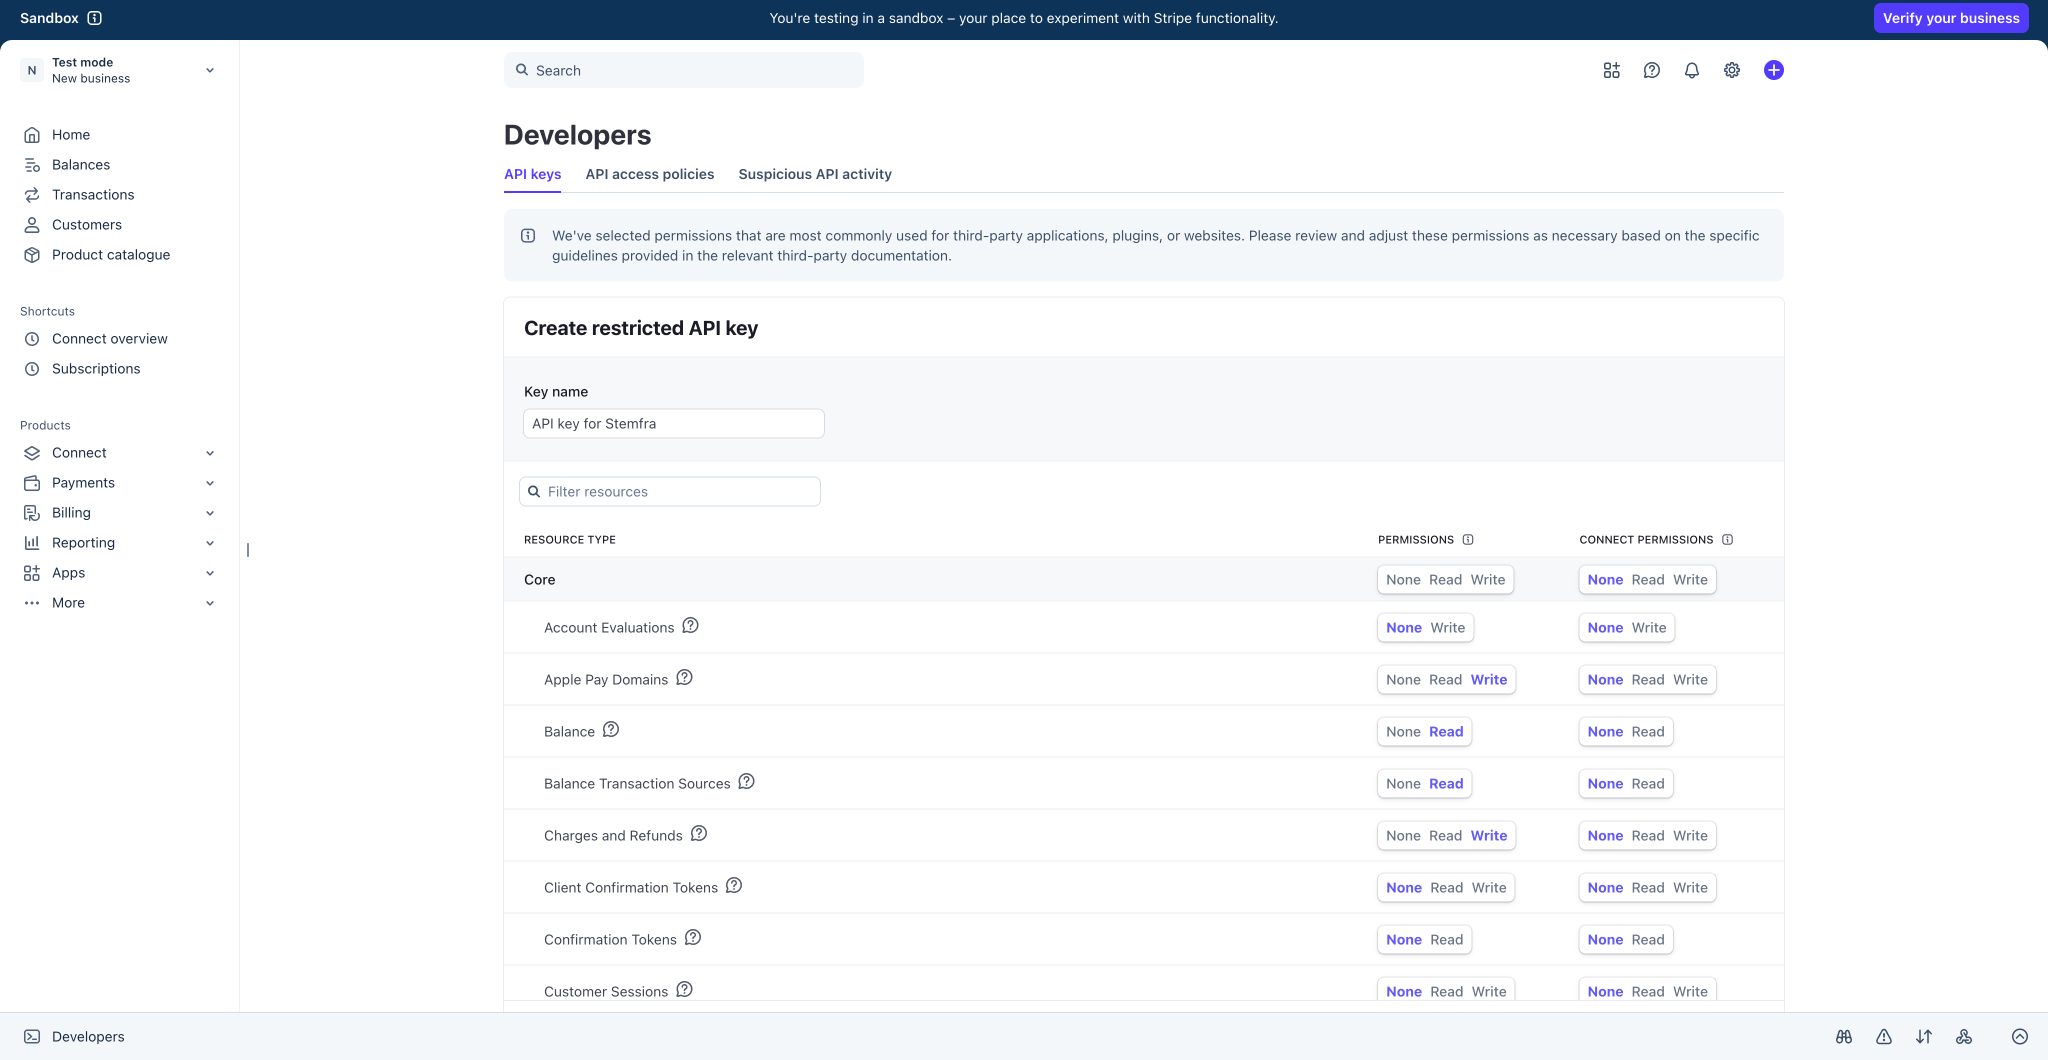
Stripe pre-selects a broad set of permissions. First, clear them: each grey section header has its own None / Read / Write buttons, so click None on each section header to reset everything. Then set only these three, in the left Permissions column:
| Where to find it | Resource | Set to |
|---|---|---|
| Under the Core section | Charges and Refunds | Write |
| Under the Core section | Payment Intents | Read |
| Its own section, just below Core | Checkout Sessions | Write |
Everything else, including the whole Billing section and the entire Connect permissions column, stays at None.
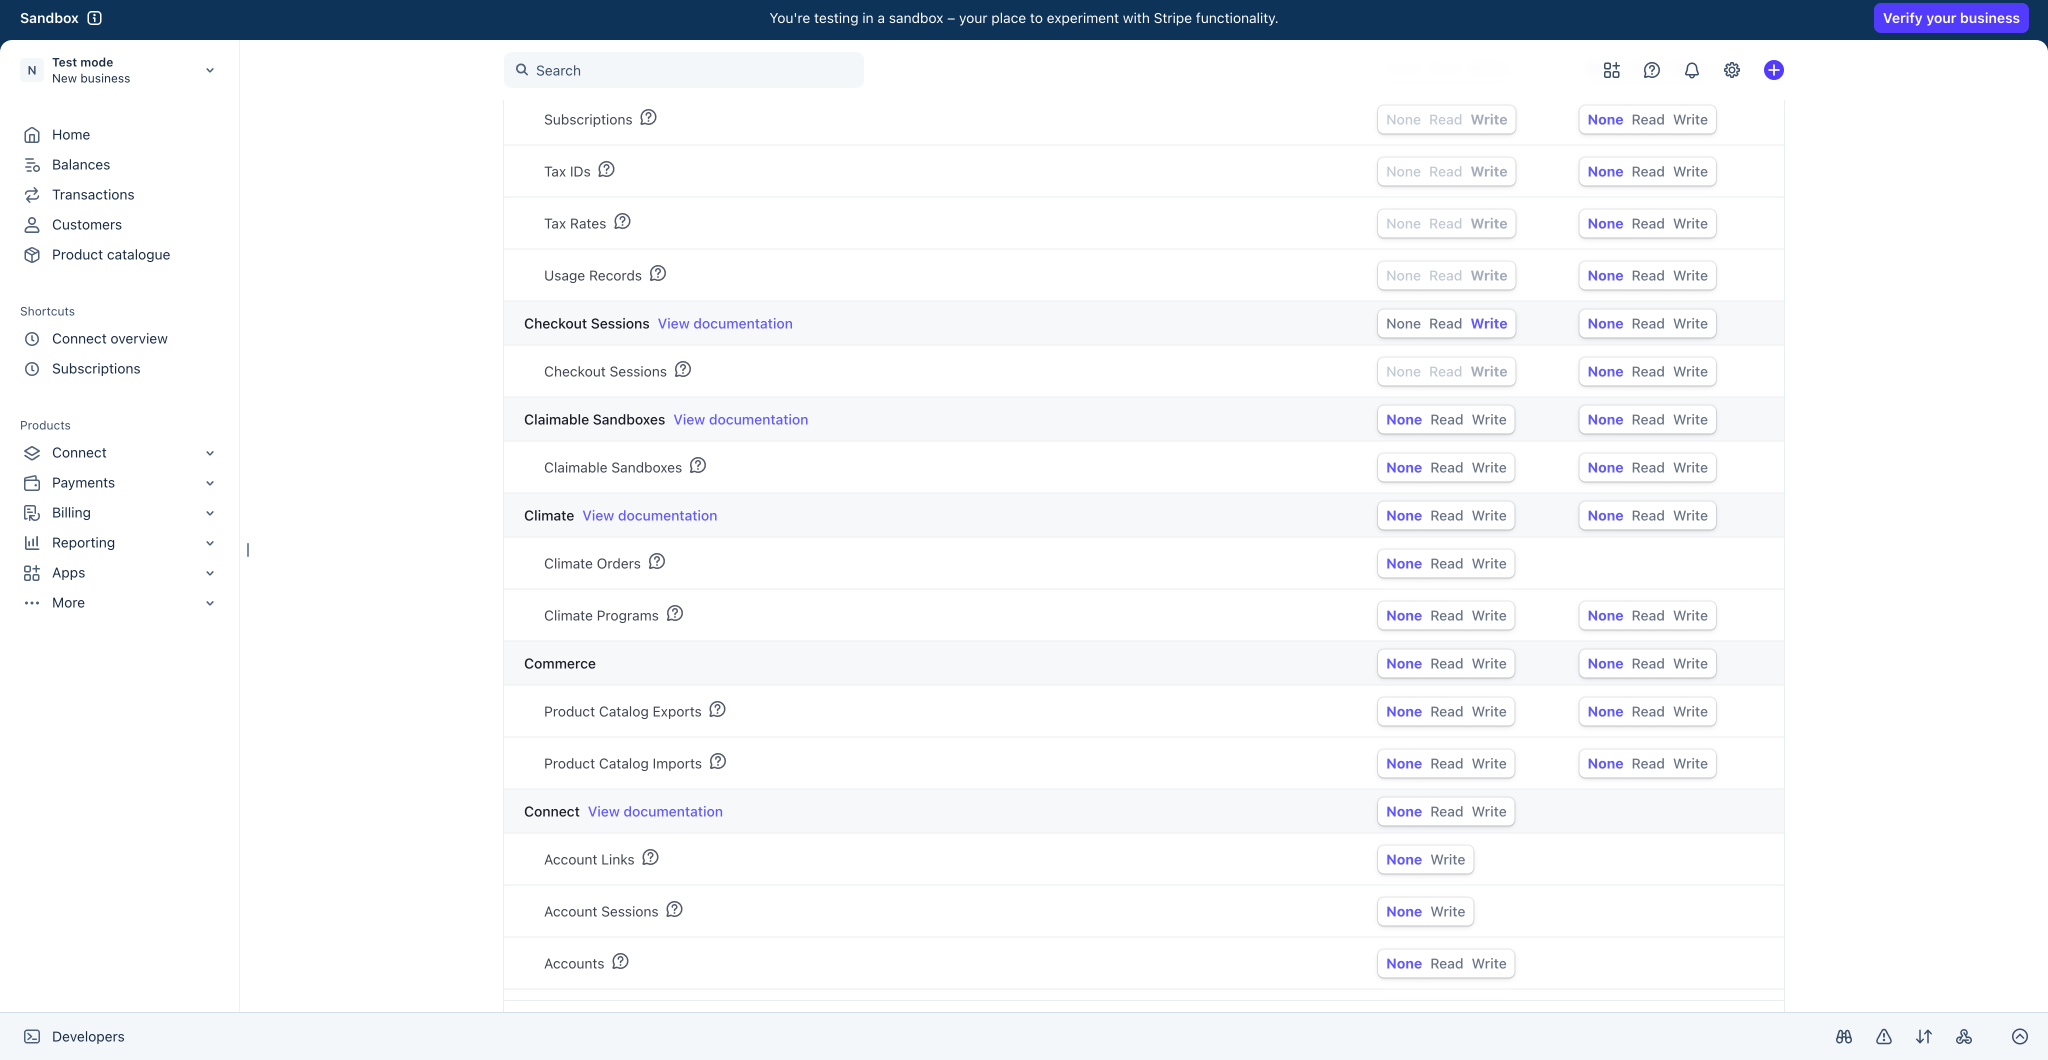
These three are the only things Stemfra ever does on your account: open the secure payment page when a customer books, confirm that a payment succeeded, and let you issue a refund. With this key, no one can move money out of your account, see your customer list, or change your settings.
Step 5: Create the key and copy it
Click Create key. Stripe shows you the new key once. It starts with rk_test_ (or rk_live_ in live mode).
Copy the key immediately. Stripe only shows the full key one time. If you lose it, you will have to create a new one.
Step 6: Copy your Publishable key (optional)
Back on the API keys page, your Publishable key (starting pk_) is always visible. Copy it too. It is safe to share and helps some payment features work smoothly.